Wednesday, October 27, 2010

Clean up! Clean up! Everybody Clean Up!

Organizing your young child’s room is a lot of fun…beautiful colors, bold patterns, and cute little bins in all shapes and sizes. Keeping it in order as they navigate their way through changes in clothing and toys is another matter altogether! Before you jump into transforming your little one’s room and spend a load of cash, take a look at these simple solutions to create storage that can be easily maintained and “grows with your child”.

  1. Store books where kids can easily access them, such as under a bench seat in cubbies or on a bookshelf that can also hold small baskets for small items.
  2. A good storage system inside the closet will make good use of the vertical space and eliminate the need for dressers. Add another hanging rod to maximize the space for those itty-bitty clothes.
  3. Label bins and baskets to make finding and cleaning up toys a breeze. Print pictures of the contents for the little ones.
  4. Drawer dividers keep little clothes organized into categories, and prevent those tiny tights from getting lost in a mound of sweaters.
  5. Over the door shoe organizers are a great storage option for anything but shoes. Toys, hats, small books, socks, undies, and stuffies are perfect candidates.
  6. Hanging canvas sweater organizers are an inexpensive way to create shelves for clothing or accessories. Try labeling each of the 5 cubbies with the days of the week for early school goers. Having their outfits pre-set for the week could save many morning meltdowns on what to where!
  7. An under the bed storage bin works great for all the craft projects your child brings home from school or seasonal clothing.
  8. Modular units with canvas storage bins are the perfect storage solution for the bottom half of any closet or in the room itself.

My personal favorites mentioned above are the “shoe organizers” and the “modular units”. How you choose to utilize these TWO FAVS is up to you…the possibilities are endless!

The Mini Stash by Simply Stashed


The Cube Organizer by Martha Stewart at Home Depot

____________________________________________________________

About the Author

Sylvia Daoust is the owner of Niche Designs Inc., a company focused on creating streamlined homes and small businesses. We provide organizing solutions to fit your needs and your budget…with consistent support every step of the way.

Visit http://www.nichedesignsinc.com for access to FREE “Sorting Secrets” and learn how you can stay on top of everything.


Tweet with Sylvia

Sylvia's Blog

Find her on Facebook

Monday, October 25, 2010

Calm. Fresh. Not Pink!

Lavender is a color that can be paired well with so many other colors, each giving it such a different look. This fall, paired with grey, lavender has become a popular trend for a more sophisticated nursery! If done right this is a color combination that can last through infancy right on up to teen!

I did a little shopping around and found some gorgeous things!


Crib Bedding by Bananafish
Lavender Chair by Serena & Lily

Dresser by Bratt Decor


Chandelier from The Bella Cottage. Clock from The Frog & Princess. Lampshade from Rosenberry Rooms.

Owl pillow doll from DwellDeep.

3 Berry Tissue Poms by Prosttothehost.
Heather Bloom pillow from Rosenberry Rooms.I couldn't find the proper source for this silver jewelry box but I couldn't leave it out - especially since they took the time to engrave my name on it!

Sunday, October 24, 2010

Domo Arigato, Mr. Roboto...

Remember this?


This picture was taken back in the summer when our long awaited Robot arrived. In that box is our future. Our helper. Our LIFE-SAVER! That box contained our CNC machine. CNC stands for computer numeric control. To put it in layman's terms - it cuts letters. For me. All by itself!

Ok, it doesn't JUST cut letters but at this point in time that is my main focus! On average I cut approximately 700 - 800 letters a month. Right now I do each and every letter by hand! So, when you combine that with hand painting them all you can see why an order can take as long as it does.

Some may ask why eliminate the "hand cut" aspect of things? Well, simply - so we can not only continue to produce high-quality, original products, but we will be able to produce them in a more timely matter meeting the needs of those who don't want to wait 6 - 8 weeks for an order.

We are also in the process of developing a wholesale program so we can put some of our wonderful products on the shelves of stores all over the world.

Lastly, I HAVE SO MANY IDEAS! Things I can't do on my trusty scroll saw that only has a 16" clearance! Think shaped growth charts, fancy headboards, extra large letters and so much more! The capabilities of this robot are pretty limitless and we are very excited for our maiden voyage.

Our new CNC isn't nameless. His name is Babadoo. So named by our children stemming from a phrase in a book they have that says, "this machine goes quickly from job to job." My son couldn't say job to job correctly so he used to say, "goes quickly bobadoo." Very fitting indeed!

Here is Babadoo today. He's ALMOST ready to go! It has been a really long process to assemble him. Think Ikea on steroids! Bags and bags of nuts and bolts and an instruction binder about 8 inches thick! He now just needs his dust collection system which is on the way and then all the computer stuff. Programing everything will be a very daunting, time consuming task but in the end it will be so worth it!

I'm excited to share with your our journey into robot land and I will be sure to keep you all posted as we get ready to hit the "on" switch!

Friday, October 8, 2010

Mmmm. Cake!

Betcha didn't know I used to be a cake decorator! Yup! I started out painting on Dairy Queen ice cream cakes when I was 17 and it was my profession for the next 10 years. I worked in grocery store bakeries and even a high-end cake shop. At one time being a cake artist was what I thought I wanted to do with my life, but working with food wasn't on my list of things I really liked to do! I liked the decorating; icing was a form of paint for me - hated the baking and prep work before hand!

Now, the only cakes I decorate are for my own kids. It's something I look forward to with each birthday and now that they're getting old enough to tell me what they want I usually know what I'm doing far in advance!

Since May of this year my son has been telling me he wants a police car cake for his next birthday. Well, his next birthday is finally days away and his big birthday party is this Sunday. I thought I'd give you a little glimpse at my police car creation from start to finish and hopefully make you think a little bit outside the pan when it comes to cake decorating! So, here's Reid's 4th birthday police car cake step by step!

I've never been much of a fan of the shaped cake pans. Too small, too main stream, too expensive! Who needs a special pan anyway? Watch how I make a police car out of two, 9x13 slab cakes!

**Editing to add that I ALWAYS work with frozen cake! It makes cutting so much easier and way less crumbs!**

I start with this:
Two slabs side by side on a board that admittedly I cut a bit too small for what I was about to do!

I looked online for a cartoon style police car that I liked and used it as my guide. With white icing I draw a rough outline of the police car, not worrying about keeping within the constrains of the cake:


Now you're probably scratching your head and wondering how I go from here! Well, I use a small serrated knife and cut out around my outline. Carefully removing the extra cake pieces and setting them aside.

Now I have to add onto the parts that aren't complete such as the bottom of the tires and the front of the car. Using the pieces I cut away, I hold them in place where I need to add cake. Again, I use the white icing and draw the missing pieces.


You should have enough cake scraps to add the remaining parts unless you went ridiculously too large with your original drawing in which case, if you've already cut the cake, I can't help you!

Again, I use my knife and cut away the areas that aren't part of the car. Using my icing like glue, I cover the joining edges then press them firmly together.


Do this for all the pieces and in the end you should have your shape! ( Like I said, I cut my board a little too small, but oh well!)


I clean up my board and get rid of the crumbs and the rest is all just painting! Using a round decorator tip I fill in my colors where I want them.


Now, this is a KEY piece of equipment that anyone decorating a cake should have in my opinion! A small pallet knife! With the angle it has it makes smoothing icing so much easier! After I fill in a section with icing I use my pallet knife to smooth it.


I continue doing this for each section and color until I have the police car done. If you want to go as far as the highlights, I do those by dipping my pallet knife into the white icing and just lightly smearing/smoothing it on. Like I said, icing is like paint. Lots of room to get creative and lots of forgiveness if you make a mistake!


Now you're probably wondering about those exposed edges? Myself, I always end up with a bunch of leftover icing in all the colors I used for my cake. So, I throw them all together into one container and fill up an icing bag. I didn't even mix them! You can use a star tip or a round tip for this (a larger size works best)and in an up and down zig zag motion cover the sides. Easy to do, fills it in and you don't have to worry about trying to smooth it all out! I like it because it uses up all my left over icing!


Lastly, you of course want to put an inscription on there but who wants to write on top of a piece of artwork? I write right on the board! The best part? If you make a mistake you can just wipe if off and start again!

Here's my finished cake! Can't wait to see my son's face when I bring it out on Sunday!

Monday, September 20, 2010

All In The Family


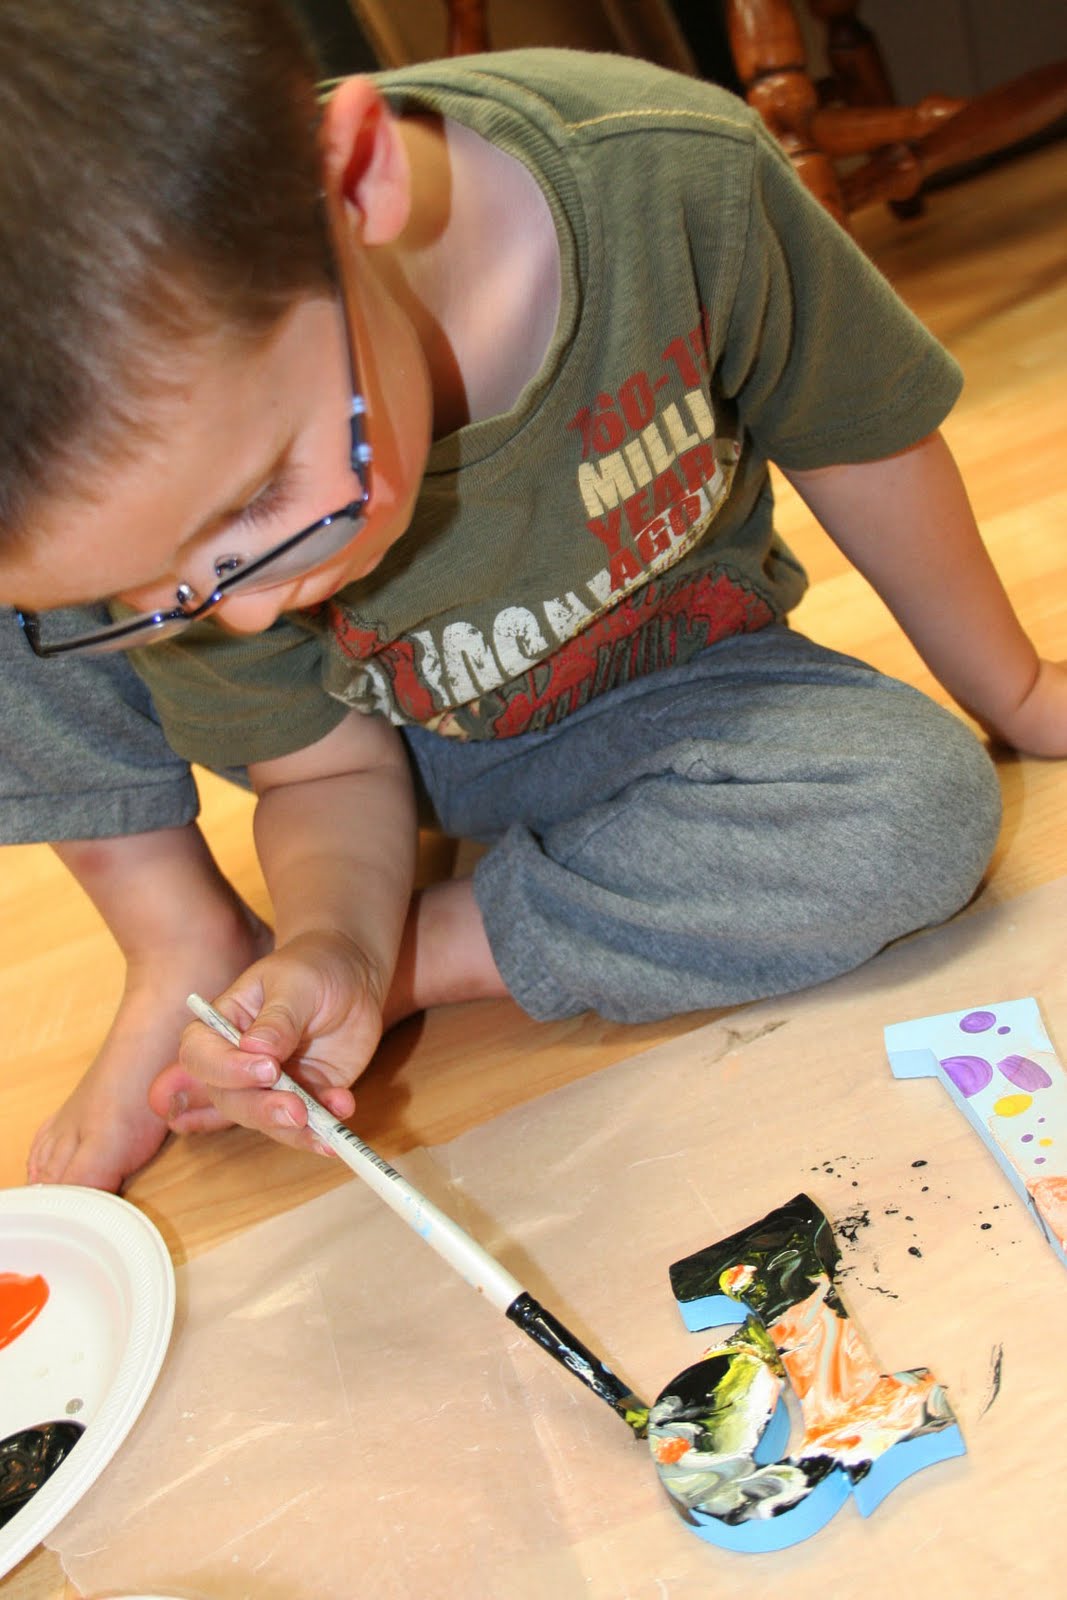
My almost 4-year-old son asked me the other day if he could paint some letters like me. So, I got together some extra letters, some paint and a brush and let him have at it!

Whenever he watches me paint he asks who the letters are for so of course, he wanted to know who his letters were for to which I replied, "oh, a little boy like you." "I think he's going to like these." he said. He concentrated very hard on his tasks and who knows? Maybe one day he'll be right along side me painting up some real orders!

Monday, August 30, 2010

MOM! Where's my favorite hair clip??


Ahhh, September. Back to school time. New clothes, new shoes, new back packs and new hair accessories!
These days you can find some pretty amazing hair bows, clippies, korkers and other cool hair accessories to match any outfit or hair type.

I was recently introduced to
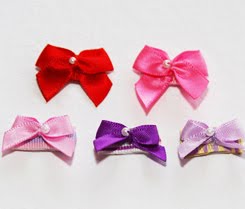
Apple Pie Accessories, a fellow Alberta, mom-run business started by Sabrina. At Apple Pie Accessories you will find high quality Hair Sassies which are alligator clips adorned with gross grain ribbon or in the case of Mbellished Hair Sassies some extra bling is added for that extra special touch. Sabrina gives you the option of adding a no-slip grip for extra fine hair which is something I know all about!

But what to do with all those Sassies?? Here at Bouncing Off The Walls we have created our own line of custom designed and hand painted hair bow holders that are second to none. I can guarantee you will not find anything like them out there! All of our hair bow holders can be completely customized to go with any theme, decor or colors. They hang on the wall and have plenty of ribbon from which to attach all those hair accessories.


For the month of September Bouncing Off The Walls has teamed up with Apple Pie Accessories and with every purchase of a hair bow holder you will receive a FREE set of Hair Sassies! So if you've been thinking about purchasing a hair bow holder then now is the time! What a great gift idea!

This offer expires October 1, 2010. Hair Sassie colors/designs will be randomly chosen and shipped with the bow holder.

Thursday, July 8, 2010

A Little Nostalgia

Inspired by a discussion about nursery decor in the 1970's and 1980's I decided to do a little digging and found someone I had forgotten all about! I'm sure that I am dating myself by sharing with you this little girl, but if you're eh um.....young? like me then you'll remember her too!

Holly Hobby was actually born in 1944 and is a REAL person! She is an American writer and illustrator who wrote the Toot And Puddle books that are now a popular children's show and also the creator of the fictional character that bears her own name. Born Denise Holly Ulinskas, she married Douglas Hobbie in 1964.

In the early 1970s, Hobbie sold distinctive artwork of a cat-loving, rag dress-wearing little girl in a giant bonnet to American Greetings. This series of illustrations became immensely popular and her originally nameless character became known as "Holly Hobbie".

I honestly have to say that I haven't heard even one mention of Holly Hobbie in YEARS! What a wonderful theme to build a girl's bedroom or nursery around! Classic, soft and uber girly Holly would make any little girl happy regardless of what era she's born in.

Once again I turned to Etsy first for my search in Holly Hobbie items as it is a great source for vintage items. Sure enough I was not left disappointed!

This vintage twin sized sheet from My Vintage Whimsy could be made to fit a crib or toddler bed! You could also use it as fabric to create throw pillows or wall art!
Love this pitcher! How gorgeous would it be sitting on the dresser atop a dainty lace doily?
Pitcher courtesy of Cales Van Vintage Finds

Of course, the room wouldn't be complete without Miss Holly herself sitting on a shelf or cabinet somewhere!
Holly Hobby Doll found at REdesignkc

With so many colors in her dress it's easy to pick a favorite and make the room any one you wish! Tea sets, kittens, bonnets and patchwork! A great theme to be able to add your own twist to. So if you're looking for ideas for a girl's room or nursery and you'd like to stay away from the main stream - why not go vintage and think about things from your own childhood that hold a place in your heart?

Next up? Raggedy Ann, of course!