I'm not a shy person at all. If you meet me in real life you will see that I have no problems chatting with you and, in fact, could probably stand to talk a little less and listen more. However, there is one thing I AM a little shy about and that's being on camera! I know you can all relate. We all dislike the sound of our own voices and we all pick ourselves apart in photos so it's only natural that when the two are combined we get a little queasy at the thought of sharing it for the world to see. Or at least I feel queasy about it. BUT! I love challenges. I love forcing myself to step out of my comfort zone and try things that make me feel uncomfortable.
Video blogging, or Vlogging as it's known, is one of those things. So I did it. Today. Completely unrehearsed and spur-of-the-moment. Like, I didn't even know I was going to do it ten minutes before I did. And here it is. For all the world to see. *GULP!*

Bouncing Off The Walls specializes in wooden wall letters of all shapes and sizes. We manufacture everything ourselves allowing you to get EXACTLY what you want! Hand painted means everything is customizable so let us create something special for someone special in your life!
Showing posts with label bouncing off the walls. Show all posts
Showing posts with label bouncing off the walls. Show all posts
Thursday, May 2, 2013


Tuesday, October 9, 2012
New! Christmas Card Holders
Ever wonder where or how to display all those Christmas cards you get? Get creative and display them all with these wonderful, winter themed Christmas card holders. They measure
4.5" - 5" depending on the design and have 5 feet of natural twine between them
with 10 close pins included for hanging cards or artwork on.
Hang a few ornaments, Christmas crafts done by your kids or even candy canes between the cards for a stunning Christmas display!
Sold individually or in a set of three get them now because they're only here for a limited time while quantities last!


Love what you see? Pin it!
Sunday, August 5, 2012
New! Rustic Wall Letters

These new wall letters are just perfect for a softer look, a nature theme or a nursery that has a lot of busy patterns in other decor aspects such as a patterned wall paper. These Rustic Wooden Wall Letters come in nine
different colors as shown below. Available in lowercase Cheri font only they are
painted, distressed to the perfect look and ready to hang with D-Ring wire hooks
on the back. Mix and match the colors for a completely original look!
Hmmmm, what color would you get?


Love these? Pin them!!
Wednesday, March 21, 2012
Not Good Enough
Not Good Enough. That is what I keep hearing from BOTH of my children when it comes to writing, colouring and drawing. My son is 5 and in kindergarten, my daughter is 3 1/2 and in preschool. They are like oil and water when it comes to their personalities and learning styles.
My son is all about the gross motor skills. He's a natural born athlete. From the time he could hold a baseball bat he could hit a ball pitched to him. He can drive a golf ball off a tee better than some adults I know. He has amazing coordination and ability with pretty much every sport he tries, but he hates colouring. And writing. And pretty much anything that requires him to sit down with a pencil in hand and put lead to paper.
My daughter is the opposite. Sports aren't her thing. She's the kid who complains of tired legs two minutes into a walk and has no interest in playing any sports. Give her a colouring book and some crayons however and you'll hardly see her all day. For three years old it's clear that she has some natural born artistic talent. Glad to know I passed SOMETHING on!
The problem? They BOTH think they're not good enough. My son had vision issues and when he was three we learned he was extremely far-sighted. Two years, glasses and an eye surgery later his vision is drastically improved. We blamed the eye problems for his lack of interest in writing or colouring. Now, I'm not so sure. He started kindergarten in September and at the time the only thing he could write was his name. I wasn't too worried as I figured that being in school would get him improving in no time. We signed him up to work with an occupational therapist because they're free and available to kindergarten kids. I have trouble trying to teach him this stuff without him getting frustrated so I figured we would use the resources available to us and go from there.
Today he is not a lot further ahead. I question a lot of things: Have we just not worked with him enough? Did his vision issues put him that far behind? Is it simply where his interests lie? (This is a kid who went to a Titanic exhibit that was in town and can now tell you everything about the Titanic so I know it's not about learning!) Socially he's ahead of the game, has a great attention span and is quite mature for his age so I know it's not a behaviour issue.
Tonight I think I may have put my finger on something. With MUCH arguing and bribing we all sat down as a family to work. My son with his dad ( I figured he'd have more patience than me!) and my daughter with me. My son has some work sheets with simple X's, diamonds and diagonal lines that he has to trace that will help him with pencil grip and control. With my daughter we just worked on her name.
Well it was a disaster. My son drew one line and his first response to his work was, "But it's not perfect! I didn't stay on the line all the way down. It's wobbly!" See picture #1 to see just how NOT wobbly and imperfect his line is. My daughter? I wrote out her name and had her copy it. She drew a perfect "D." And then started crying. "I can't do it! It looks silly! It's not beautiful like yours!" See picture #2 to see just how NOT imperfect her "D" is.
Picture #1 (His are the pencil lines over the black lines)

Picture #2 (The blue is mine, she drew the orange "D." She's THREE)

It got me thinking......did I create this? Now, I'm a self-admitted perfectionist. I'll be the first to admit that I uttered a lot of those same phrases as a child (and even as an adult my husband would tell you!) but I'm pretty sure I never put those expectations on my children. Knowingly. But what if I have unknowingly? Children mimic what they see, right? What if, in my own quest for having everything perfect I've somehow taught my children that they have to be? Even though we are always very encouraging and supportive I guess it's perfectly reasonable that actions speak louder than words.
I will also admit that I RARELY sit down and work on these things with my kids so I KNOW I haven't been putting unrealistic expectations on them!
Does my being an artist come into play here? I actually don't draw or do crafts with them much anymore because they know what I can do so they want me to do it ALL. I tell them that they should try and draw a cat for example and they'll counter with, "I want you to draw it because yours is better!" So now I hand them their craft boxes and I don't join in. I let them just have at it by themselves. I don't personally know any other artists with kids so I have no one to tell me if they've encountered the same thing.
What do you think? Do you have kids that strive to be perfect? Is anyone reading this an artist with similar issues when it comes to their kids? If you've been through this any suggestions? I would LOVE some feedback here!
To show you, here is a video of my daughter on her second "D" drawing attempt. Just so you see what I mean!
My son is all about the gross motor skills. He's a natural born athlete. From the time he could hold a baseball bat he could hit a ball pitched to him. He can drive a golf ball off a tee better than some adults I know. He has amazing coordination and ability with pretty much every sport he tries, but he hates colouring. And writing. And pretty much anything that requires him to sit down with a pencil in hand and put lead to paper.
My daughter is the opposite. Sports aren't her thing. She's the kid who complains of tired legs two minutes into a walk and has no interest in playing any sports. Give her a colouring book and some crayons however and you'll hardly see her all day. For three years old it's clear that she has some natural born artistic talent. Glad to know I passed SOMETHING on!
The problem? They BOTH think they're not good enough. My son had vision issues and when he was three we learned he was extremely far-sighted. Two years, glasses and an eye surgery later his vision is drastically improved. We blamed the eye problems for his lack of interest in writing or colouring. Now, I'm not so sure. He started kindergarten in September and at the time the only thing he could write was his name. I wasn't too worried as I figured that being in school would get him improving in no time. We signed him up to work with an occupational therapist because they're free and available to kindergarten kids. I have trouble trying to teach him this stuff without him getting frustrated so I figured we would use the resources available to us and go from there.
Today he is not a lot further ahead. I question a lot of things: Have we just not worked with him enough? Did his vision issues put him that far behind? Is it simply where his interests lie? (This is a kid who went to a Titanic exhibit that was in town and can now tell you everything about the Titanic so I know it's not about learning!) Socially he's ahead of the game, has a great attention span and is quite mature for his age so I know it's not a behaviour issue.
Tonight I think I may have put my finger on something. With MUCH arguing and bribing we all sat down as a family to work. My son with his dad ( I figured he'd have more patience than me!) and my daughter with me. My son has some work sheets with simple X's, diamonds and diagonal lines that he has to trace that will help him with pencil grip and control. With my daughter we just worked on her name.
Well it was a disaster. My son drew one line and his first response to his work was, "But it's not perfect! I didn't stay on the line all the way down. It's wobbly!" See picture #1 to see just how NOT wobbly and imperfect his line is. My daughter? I wrote out her name and had her copy it. She drew a perfect "D." And then started crying. "I can't do it! It looks silly! It's not beautiful like yours!" See picture #2 to see just how NOT imperfect her "D" is.
Picture #1 (His are the pencil lines over the black lines)

Picture #2 (The blue is mine, she drew the orange "D." She's THREE)

It got me thinking......did I create this? Now, I'm a self-admitted perfectionist. I'll be the first to admit that I uttered a lot of those same phrases as a child (and even as an adult my husband would tell you!) but I'm pretty sure I never put those expectations on my children. Knowingly. But what if I have unknowingly? Children mimic what they see, right? What if, in my own quest for having everything perfect I've somehow taught my children that they have to be? Even though we are always very encouraging and supportive I guess it's perfectly reasonable that actions speak louder than words.
I will also admit that I RARELY sit down and work on these things with my kids so I KNOW I haven't been putting unrealistic expectations on them!
Does my being an artist come into play here? I actually don't draw or do crafts with them much anymore because they know what I can do so they want me to do it ALL. I tell them that they should try and draw a cat for example and they'll counter with, "I want you to draw it because yours is better!" So now I hand them their craft boxes and I don't join in. I let them just have at it by themselves. I don't personally know any other artists with kids so I have no one to tell me if they've encountered the same thing.
What do you think? Do you have kids that strive to be perfect? Is anyone reading this an artist with similar issues when it comes to their kids? If you've been through this any suggestions? I would LOVE some feedback here!
To show you, here is a video of my daughter on her second "D" drawing attempt. Just so you see what I mean!
Monday, April 11, 2011
Bye Bye Nemo!
As some of you know, I've been redoing my daughter's bedroom. (See this blog post for the details)
Ok. So the truth? I've been THINKING about redoing my daughter's room. Imagining it, planning it in my head, buying things for it. But the actual DOING it hasn't really taken off! Spare time around here is harder to come by than a springtime in Alberta without a blizzard!
So, this weekend, with plenty of other things to do, I got started on her room. If I don't just do it; it won't happen. First task? Saying goodbye to the Finding Nemo mural that I painted on the wall about 7 years ago before I even had kids.
Covering a wall mural is not a project that is high on my "want-to-do" list. Until I found this wall paper from Sears.

I bought this wall paper a long time ago and it's been sitting here waiting for me. I was nervous. I have never put up wall paper before. I had visions of it stuck to everything but the walls, full of rips and tears, the paper not staying and a husband who will never help me with any project again. But, I was pleasantly surprised and I'm over the moon happy with the results!
It was definitely a two person job and I'm lucky that my husband is over 6 ft tall! I will say that although it wasn't a FUN job, it was a fairly easy one and we got it done in good time.
Here's the wall before hand:

Here it is when we were half finished. You can still see the mural through the paper but I wasn't too worried about that because we will be painting it.

We finished the whole wall in about an hour and a half. That seems long but you have to wait while each strip sits wet for 5 minutes between wetting it and putting it up so we got a bunch of 5 minute breaks in there!
I have to trim around the edges still. My concern over seeing the mural through the paper? Well, when the paper dried you couldn't see it at all! All the bubbles disappeared and the wall looks amazing! The only downfall? I have to wait 72 hours to paint it and now I'm raring to go!
We did end up with a lot of wasted paper simply because you have to line the design up. I thought I had bought too much (2 rolls) but we needed it. I have a bunch extra but nothing that would line up or be long enough to do from floor to ceiling and still line up. I think this is a conspiracy on the wall paper company's part! Therefore, for this one wall cost us about $20 which isn't bad but if you were doing a whole room it could add up.
All in all, if you have a mural to cover, this textured wall paper is a fantastic, easy way to go. No sanding down paint lumps or brush strokes and no painting 5 or 6 coats of paint to cover the image. I didn't even wash the wall. The best part? One day when we don't live in this house - someone is bound to Find Nemo!


Ok. So the truth? I've been THINKING about redoing my daughter's room. Imagining it, planning it in my head, buying things for it. But the actual DOING it hasn't really taken off! Spare time around here is harder to come by than a springtime in Alberta without a blizzard!
So, this weekend, with plenty of other things to do, I got started on her room. If I don't just do it; it won't happen. First task? Saying goodbye to the Finding Nemo mural that I painted on the wall about 7 years ago before I even had kids.
Covering a wall mural is not a project that is high on my "want-to-do" list. Until I found this wall paper from Sears.

I bought this wall paper a long time ago and it's been sitting here waiting for me. I was nervous. I have never put up wall paper before. I had visions of it stuck to everything but the walls, full of rips and tears, the paper not staying and a husband who will never help me with any project again. But, I was pleasantly surprised and I'm over the moon happy with the results!
It was definitely a two person job and I'm lucky that my husband is over 6 ft tall! I will say that although it wasn't a FUN job, it was a fairly easy one and we got it done in good time.
Here's the wall before hand:

Here it is when we were half finished. You can still see the mural through the paper but I wasn't too worried about that because we will be painting it.

We finished the whole wall in about an hour and a half. That seems long but you have to wait while each strip sits wet for 5 minutes between wetting it and putting it up so we got a bunch of 5 minute breaks in there!
I have to trim around the edges still. My concern over seeing the mural through the paper? Well, when the paper dried you couldn't see it at all! All the bubbles disappeared and the wall looks amazing! The only downfall? I have to wait 72 hours to paint it and now I'm raring to go!
We did end up with a lot of wasted paper simply because you have to line the design up. I thought I had bought too much (2 rolls) but we needed it. I have a bunch extra but nothing that would line up or be long enough to do from floor to ceiling and still line up. I think this is a conspiracy on the wall paper company's part! Therefore, for this one wall cost us about $20 which isn't bad but if you were doing a whole room it could add up.
All in all, if you have a mural to cover, this textured wall paper is a fantastic, easy way to go. No sanding down paint lumps or brush strokes and no painting 5 or 6 coats of paint to cover the image. I didn't even wash the wall. The best part? One day when we don't live in this house - someone is bound to Find Nemo!


Wednesday, December 8, 2010
Time for a change!
People say to me all the time, "your kids must have the most fantastic rooms!" It's obvious why one would think such a thing but the reality brings back the old saying, "the cobbler's kids have no shoes."
Although I have spent time on their rooms and they both have wall letters spelling their names and a few other various items I've painted I've never really taken the time to really plan them and make them magazine worthy! Time is ALWAYS an issue for me!
My son who is the oldest did get a new "big boy" room when his little sister came along but it still needs a few finishing pieces that I just never get around to. But, for the most part, his room is pretty awesome and he does like to show it off.
Now, my poor daughter. That is what sparked this blog post! Her room was never made for her. It was my old office turned nursery. Before kids when I was still starting out in my mural business I painted a Finding Nemo mural on the wall in my office. When I got pregnant for the first time we didn't find out what we were having so we left the mural and turned the room into a nursery with gender-neutral colouring to match the Nemo theme.
My kids are only 19 months apart so my son wasn't long in the Nemo room before it was time for him to move. Again, we didn't find out what we were having and kept the fish for baby number two!
Well, my daughter is now 2 1/2 and it's time for a change! Nemo and his friends have got to go and we need to change this space into something a little more girlie, a little more "Devyn!" The letters I painted for her, although nice, were painted solely to match the colors in the room. Her growth chart I did because I needed a girl theme growth chart for a trade show! I did have a bow holder for her room but, bad mommy, I sold it to save myself time saying I would make her a new one soon.
So, I'm going to start from scratch! Get rid of the mural. Repaint. Begin with a blank canvas and document it here to share with you! (You'll all help hold me accountable for finishing!)
Here's a peak at the Before (right now) pictures:


I know what you're thinking! What kid wouldn't LOVE this room, right? And she does like it. But, It's been the same way for 6 years and I really do want to make a room just for her.
To give you a little sneak peak into the direction I'm headed, I bought these beautiful water colour prints from This Little Piggy Prints on Etsy and they are what we're starting with. The rest of the room will come together based on these.

Can't wait to get started!
Although I have spent time on their rooms and they both have wall letters spelling their names and a few other various items I've painted I've never really taken the time to really plan them and make them magazine worthy! Time is ALWAYS an issue for me!
My son who is the oldest did get a new "big boy" room when his little sister came along but it still needs a few finishing pieces that I just never get around to. But, for the most part, his room is pretty awesome and he does like to show it off.
Now, my poor daughter. That is what sparked this blog post! Her room was never made for her. It was my old office turned nursery. Before kids when I was still starting out in my mural business I painted a Finding Nemo mural on the wall in my office. When I got pregnant for the first time we didn't find out what we were having so we left the mural and turned the room into a nursery with gender-neutral colouring to match the Nemo theme.
My kids are only 19 months apart so my son wasn't long in the Nemo room before it was time for him to move. Again, we didn't find out what we were having and kept the fish for baby number two!
Well, my daughter is now 2 1/2 and it's time for a change! Nemo and his friends have got to go and we need to change this space into something a little more girlie, a little more "Devyn!" The letters I painted for her, although nice, were painted solely to match the colors in the room. Her growth chart I did because I needed a girl theme growth chart for a trade show! I did have a bow holder for her room but, bad mommy, I sold it to save myself time saying I would make her a new one soon.
So, I'm going to start from scratch! Get rid of the mural. Repaint. Begin with a blank canvas and document it here to share with you! (You'll all help hold me accountable for finishing!)
Here's a peak at the Before (right now) pictures:


I know what you're thinking! What kid wouldn't LOVE this room, right? And she does like it. But, It's been the same way for 6 years and I really do want to make a room just for her.
To give you a little sneak peak into the direction I'm headed, I bought these beautiful water colour prints from This Little Piggy Prints on Etsy and they are what we're starting with. The rest of the room will come together based on these.

Can't wait to get started!
Saturday, November 13, 2010
Shop Local!

The Christmas season is upon us and with it brings lists of gifts to buy for families and friends. Coming up with ideas for WHAT to buy someone can be tricky, but how about WHERE you buy it?
How much of your shopping is done locally? Just a few last minute items? Where do you do the bulk of your shopping?
According to Michael H. Shuman, author of Going Local, "Going local does not mean walling off the outside world. It means nurturing locally owned businesses which use local resources sustainably, employ local workers at decent wages and serve primarily local consumers. It means becoming more self-sufficient and less dependent on imports. Control moves from the boardrooms of distant corporations and back into the community where it belongs."
Being a small business owner I'm perhaps a bit biased, but I'll give you ten reasons WHY you should be shopping local and keeping your business where you live!
- Local business owners will invest more in your community. Generally, they live in the community themselves therefore having more interest in the welfare and future of the community. They'll contribute to sports teams, donate to charity events and take part in activities.
- The customer service is better. Period. Because they care about the community they care how you feel when you walk out the door. Their business is a reflection of themselves and as they are highly likely to come face to face with their customers while they're out and about they are less likely to be rude or brush you off. They build relationships with their customers. They get to know you personally, helping you find what you need, ordering things in or calling you to let you know about specials, sales etc or returning items that are broken or don't work.
- They provide local jobs. Most local businesses will hire within the community first.
- It helps our environment! If you shop local you can walk, not drive to shop and I don't have to tell you the impact that can make! Saving gas money and mileage on your vehicle, congestion and pollution all at the same time!
- You're keeping your money within the community when you shop local. Local businesses will often purchase from other local businesses and service providers themselves which helps grow other businesses.
- They offer unique choices. Smaller businesses often have a great selection of unique items that you can't find elsewhere, are hand made or are exclusive to them. When you're looking for just the right gift for someone that seems like it was made especially for them then buying local might be your best bet!
- Competitive pricing. It's a common misconception that smaller businesses are more expensive but this is not always the case. A lot of brand items have suggested retail prices that most will adhere to which means businesses that carry those items will have them priced the same as the "big guys." When you factor in the saved gas money and customer service you have to wonder why you'd buy from the "big guys!"
- Quality! More unique, local items are often better made and come with great warranties or refund/exchange policies that you may not find elsewhere.
- Put your taxes to good use.Local businesses in neighborhoods need comparatively less infrastructure investment and make more efficient use of public services as compared to nationally owned stores entering the community.
- Character of the community. A lot of smaller communities have specific characteristics that make them unique. Local business owners are usually more interested in maintaining that character.
Monday, October 25, 2010
Calm. Fresh. Not Pink!
Lavender is a color that can be paired well with so many other colors, each giving it such a different look. This fall, paired with grey, lavender has become a popular trend for a more sophisticated nursery! If done right this is a color combination that can last through infancy right on up to teen!
I did a little shopping around and found some gorgeous things!
 Heather Bloom pillow from Rosenberry Rooms.
 I couldn't find the proper source for this silver jewelry box but I couldn't leave it out - especially since they took the time to engrave my name on it!
I did a little shopping around and found some gorgeous things!


 Heather Bloom pillow from Rosenberry Rooms.
 I couldn't find the proper source for this silver jewelry box but I couldn't leave it out - especially since they took the time to engrave my name on it!
 Sunday, October 24, 2010
Domo Arigato, Mr. Roboto...
Remember this?

This picture was taken back in the summer when our long awaited Robot arrived. In that box is our future. Our helper. Our LIFE-SAVER! That box contained our CNC machine. CNC stands for computer numeric control. To put it in layman's terms - it cuts letters. For me. All by itself!
Ok, it doesn't JUST cut letters but at this point in time that is my main focus! On average I cut approximately 700 - 800 letters a month. Right now I do each and every letter by hand! So, when you combine that with hand painting them all you can see why an order can take as long as it does.
Some may ask why eliminate the "hand cut" aspect of things? Well, simply - so we can not only continue to produce high-quality, original products, but we will be able to produce them in a more timely matter meeting the needs of those who don't want to wait 6 - 8 weeks for an order.
We are also in the process of developing a wholesale program so we can put some of our wonderful products on the shelves of stores all over the world.
Lastly, I HAVE SO MANY IDEAS! Things I can't do on my trusty scroll saw that only has a 16" clearance! Think shaped growth charts, fancy headboards, extra large letters and so much more! The capabilities of this robot are pretty limitless and we are very excited for our maiden voyage.
Our new CNC isn't nameless. His name is Babadoo. So named by our children stemming from a phrase in a book they have that says, "this machine goes quickly from job to job." My son couldn't say job to job correctly so he used to say, "goes quickly bobadoo." Very fitting indeed!
Here is Babadoo today. He's ALMOST ready to go! It has been a really long process to assemble him. Think Ikea on steroids! Bags and bags of nuts and bolts and an instruction binder about 8 inches thick! He now just needs his dust collection system which is on the way and then all the computer stuff. Programing everything will be a very daunting, time consuming task but in the end it will be so worth it!

I'm excited to share with your our journey into robot land and I will be sure to keep you all posted as we get ready to hit the "on" switch!

This picture was taken back in the summer when our long awaited Robot arrived. In that box is our future. Our helper. Our LIFE-SAVER! That box contained our CNC machine. CNC stands for computer numeric control. To put it in layman's terms - it cuts letters. For me. All by itself!
Ok, it doesn't JUST cut letters but at this point in time that is my main focus! On average I cut approximately 700 - 800 letters a month. Right now I do each and every letter by hand! So, when you combine that with hand painting them all you can see why an order can take as long as it does.
Some may ask why eliminate the "hand cut" aspect of things? Well, simply - so we can not only continue to produce high-quality, original products, but we will be able to produce them in a more timely matter meeting the needs of those who don't want to wait 6 - 8 weeks for an order.
We are also in the process of developing a wholesale program so we can put some of our wonderful products on the shelves of stores all over the world.
Lastly, I HAVE SO MANY IDEAS! Things I can't do on my trusty scroll saw that only has a 16" clearance! Think shaped growth charts, fancy headboards, extra large letters and so much more! The capabilities of this robot are pretty limitless and we are very excited for our maiden voyage.
Our new CNC isn't nameless. His name is Babadoo. So named by our children stemming from a phrase in a book they have that says, "this machine goes quickly from job to job." My son couldn't say job to job correctly so he used to say, "goes quickly bobadoo." Very fitting indeed!
Here is Babadoo today. He's ALMOST ready to go! It has been a really long process to assemble him. Think Ikea on steroids! Bags and bags of nuts and bolts and an instruction binder about 8 inches thick! He now just needs his dust collection system which is on the way and then all the computer stuff. Programing everything will be a very daunting, time consuming task but in the end it will be so worth it!

I'm excited to share with your our journey into robot land and I will be sure to keep you all posted as we get ready to hit the "on" switch!
Friday, October 8, 2010
Mmmm. Cake!
Betcha didn't know I used to be a cake decorator! Yup! I started out painting on Dairy Queen ice cream cakes when I was 17 and it was my profession for the next 10 years. I worked in grocery store bakeries and even a high-end cake shop. At one time being a cake artist was what I thought I wanted to do with my life, but working with food wasn't on my list of things I really liked to do! I liked the decorating; icing was a form of paint for me - hated the baking and prep work before hand!
Now, the only cakes I decorate are for my own kids. It's something I look forward to with each birthday and now that they're getting old enough to tell me what they want I usually know what I'm doing far in advance!
Since May of this year my son has been telling me he wants a police car cake for his next birthday. Well, his next birthday is finally days away and his big birthday party is this Sunday. I thought I'd give you a little glimpse at my police car creation from start to finish and hopefully make you think a little bit outside the pan when it comes to cake decorating! So, here's Reid's 4th birthday police car cake step by step!
I've never been much of a fan of the shaped cake pans. Too small, too main stream, too expensive! Who needs a special pan anyway? Watch how I make a police car out of two, 9x13 slab cakes!
**Editing to add that I ALWAYS work with frozen cake! It makes cutting so much easier and way less crumbs!**
I start with this:
 Two slabs side by side on a board that admittedly I cut a bit too small for what I was about to do!
I looked online for a cartoon style police car that I liked and used it as my guide. With white icing I draw a rough outline of the police car, not worrying about keeping within the constrains of the cake:

Now you're probably scratching your head and wondering how I go from here! Well, I use a small serrated knife and cut out around my outline. Carefully removing the extra cake pieces and setting them aside.

Now I have to add onto the parts that aren't complete such as the bottom of the tires and the front of the car. Using the pieces I cut away, I hold them in place where I need to add cake. Again, I use the white icing and draw the missing pieces.

You should have enough cake scraps to add the remaining parts unless you went ridiculously too large with your original drawing in which case, if you've already cut the cake, I can't help you!
Again, I use my knife and cut away the areas that aren't part of the car. Using my icing like glue, I cover the joining edges then press them firmly together.

 Do this for all the pieces and in the end you should have your shape! ( Like I said, I cut my board a little too small, but oh well!)

I clean up my board and get rid of the crumbs and the rest is all just painting! Using a round decorator tip I fill in my colors where I want them.

Now, this is a KEY piece of equipment that anyone decorating a cake should have in my opinion! A small pallet knife! With the angle it has it makes smoothing icing so much easier! After I fill in a section with icing I use my pallet knife to smooth it.

I continue doing this for each section and color until I have the police car done. If you want to go as far as the highlights, I do those by dipping my pallet knife into the white icing and just lightly smearing/smoothing it on. Like I said, icing is like paint. Lots of room to get creative and lots of forgiveness if you make a mistake!

Now you're probably wondering about those exposed edges? Myself, I always end up with a bunch of leftover icing in all the colors I used for my cake. So, I throw them all together into one container and fill up an icing bag. I didn't even mix them! You can use a star tip or a round tip for this (a larger size works best)and in an up and down zig zag motion cover the sides. Easy to do, fills it in and you don't have to worry about trying to smooth it all out! I like it because it uses up all my left over icing!


Lastly, you of course want to put an inscription on there but who wants to write on top of a piece of artwork? I write right on the board! The best part? If you make a mistake you can just wipe if off and start again!

Here's my finished cake! Can't wait to see my son's face when I bring it out on Sunday!

Now, the only cakes I decorate are for my own kids. It's something I look forward to with each birthday and now that they're getting old enough to tell me what they want I usually know what I'm doing far in advance!
Since May of this year my son has been telling me he wants a police car cake for his next birthday. Well, his next birthday is finally days away and his big birthday party is this Sunday. I thought I'd give you a little glimpse at my police car creation from start to finish and hopefully make you think a little bit outside the pan when it comes to cake decorating! So, here's Reid's 4th birthday police car cake step by step!
I've never been much of a fan of the shaped cake pans. Too small, too main stream, too expensive! Who needs a special pan anyway? Watch how I make a police car out of two, 9x13 slab cakes!
**Editing to add that I ALWAYS work with frozen cake! It makes cutting so much easier and way less crumbs!**
I start with this:
 Two slabs side by side on a board that admittedly I cut a bit too small for what I was about to do!
I looked online for a cartoon style police car that I liked and used it as my guide. With white icing I draw a rough outline of the police car, not worrying about keeping within the constrains of the cake:

Now you're probably scratching your head and wondering how I go from here! Well, I use a small serrated knife and cut out around my outline. Carefully removing the extra cake pieces and setting them aside.

Now I have to add onto the parts that aren't complete such as the bottom of the tires and the front of the car. Using the pieces I cut away, I hold them in place where I need to add cake. Again, I use the white icing and draw the missing pieces.

You should have enough cake scraps to add the remaining parts unless you went ridiculously too large with your original drawing in which case, if you've already cut the cake, I can't help you!
Again, I use my knife and cut away the areas that aren't part of the car. Using my icing like glue, I cover the joining edges then press them firmly together.

 Do this for all the pieces and in the end you should have your shape! ( Like I said, I cut my board a little too small, but oh well!)
I clean up my board and get rid of the crumbs and the rest is all just painting! Using a round decorator tip I fill in my colors where I want them.

Now, this is a KEY piece of equipment that anyone decorating a cake should have in my opinion! A small pallet knife! With the angle it has it makes smoothing icing so much easier! After I fill in a section with icing I use my pallet knife to smooth it.

I continue doing this for each section and color until I have the police car done. If you want to go as far as the highlights, I do those by dipping my pallet knife into the white icing and just lightly smearing/smoothing it on. Like I said, icing is like paint. Lots of room to get creative and lots of forgiveness if you make a mistake!

Now you're probably wondering about those exposed edges? Myself, I always end up with a bunch of leftover icing in all the colors I used for my cake. So, I throw them all together into one container and fill up an icing bag. I didn't even mix them! You can use a star tip or a round tip for this (a larger size works best)and in an up and down zig zag motion cover the sides. Easy to do, fills it in and you don't have to worry about trying to smooth it all out! I like it because it uses up all my left over icing!


Lastly, you of course want to put an inscription on there but who wants to write on top of a piece of artwork? I write right on the board! The best part? If you make a mistake you can just wipe if off and start again!

Here's my finished cake! Can't wait to see my son's face when I bring it out on Sunday!

Monday, September 20, 2010
All In The Family

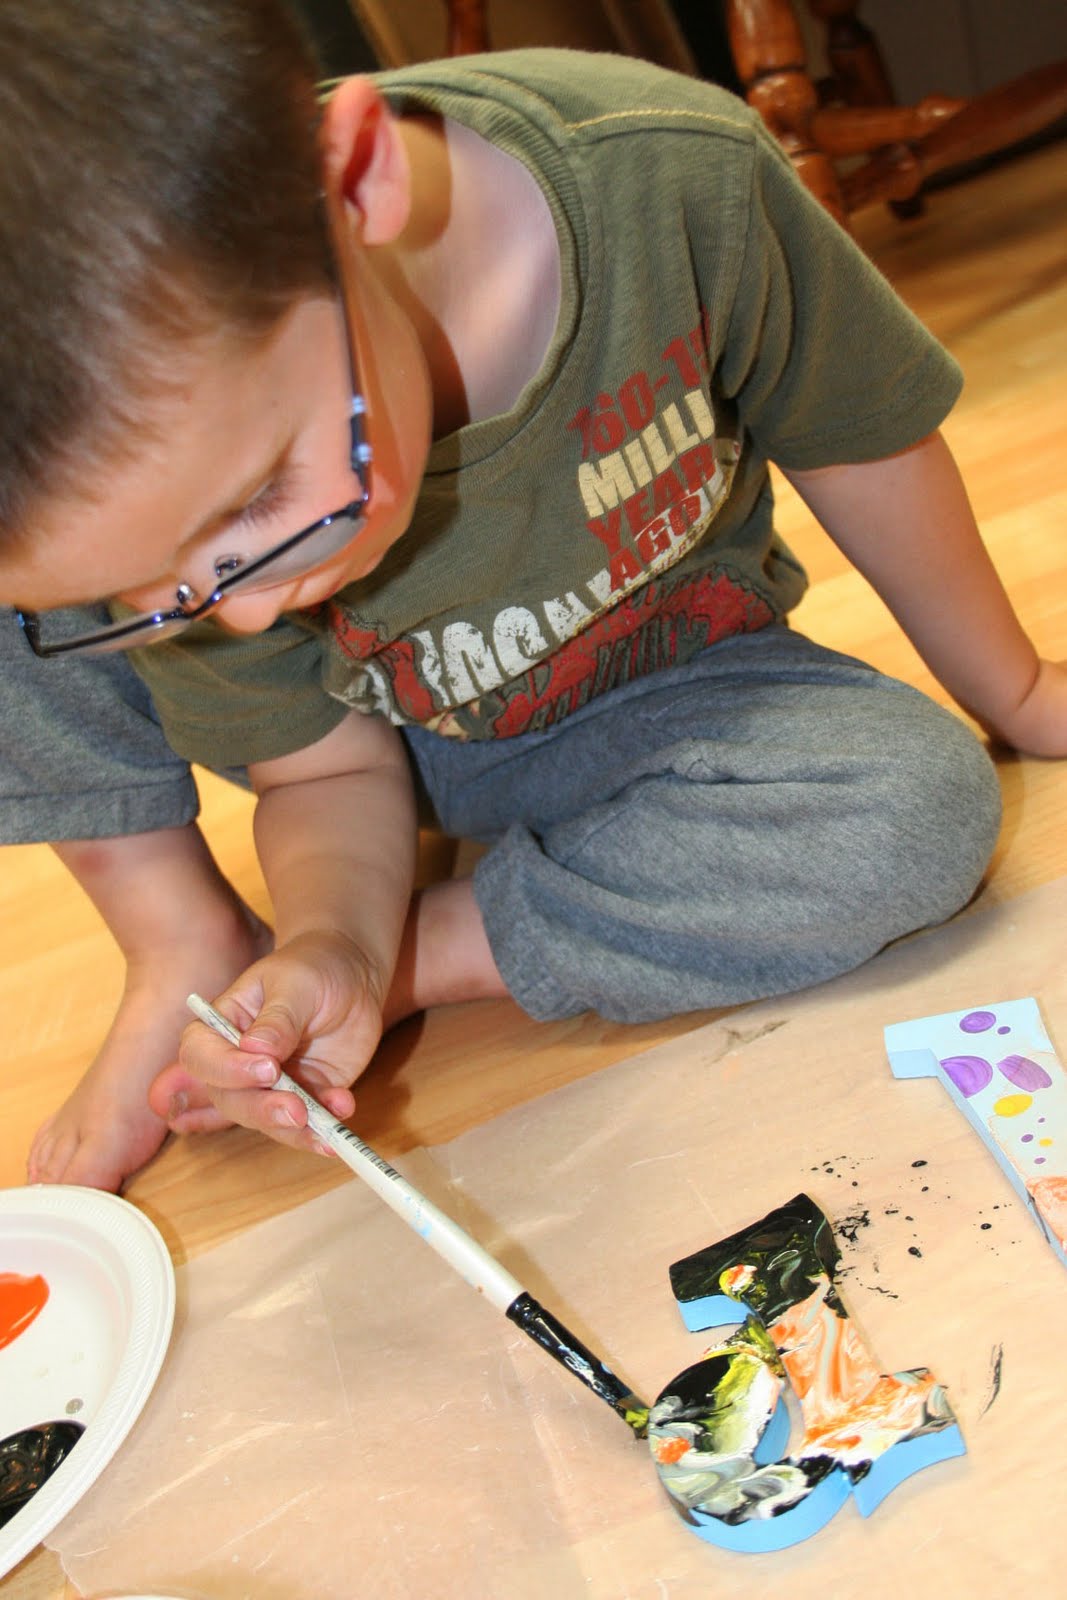
My almost 4-year-old son asked me the other day if he could paint some letters like me. So, I got together some extra letters, some paint and a brush and let him have at it!
Whenever he watches me paint he asks who the letters are for so of course, he wanted to know who his letters were for to which I replied, "oh, a little boy like you." "I think he's going to like these." he said. He concentrated very hard on his tasks and who knows? Maybe one day he'll be right along side me painting up some real orders!
Monday, August 30, 2010
MOM! Where's my favorite hair clip??

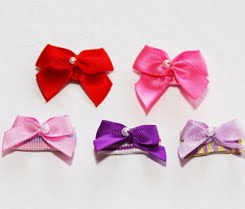
Ahhh, September. Back to school time. New clothes, new shoes, new back packs and new hair accessories! These days you can find some pretty amazing hair bows, clippies, korkers and other cool hair accessories to match any outfit or hair type.
I was recently introduced to Apple Pie Accessories, a fellow Alberta, mom-run business started by Sabrina. At Apple Pie Accessories you will find high quality Hair Sassies which are alligator clips adorned with gross grain ribbon or in the case of Mbellished Hair Sassies some extra bling is added for that extra special touch. Sabrina gives you the option of adding a no-slip grip for extra fine hair which is something I know all about!
But what to do with all those Sassies?? Here at Bouncing Off The Walls we have created our own line of custom designed and hand painted hair bow holders that are second to none. I can guarantee you will not find anything like them out there! All of our hair bow holders can be completely customized to go with any theme, decor or colors. They hang on the wall and have plenty of ribbon from which to attach all those hair accessories.

For the month of September Bouncing Off The Walls has teamed up with Apple Pie Accessories and with every purchase of a hair bow holder you will receive a FREE set of Hair Sassies! So if you've been thinking about purchasing a hair bow holder then now is the time! What a great gift idea!
This offer expires October 1, 2010. Hair Sassie colors/designs will be randomly chosen and shipped with the bow holder.
Subscribe to:
Posts (Atom)