Showing posts with label paint. Show all posts

Saturday, February 16, 2013

DIY Nightmare!

So I'm not one for redoing furniture. I don't have the patience or the time. Then a friend put me on to this dresser that someone was selling on Kijiji.


We don't have a proper T.V. stand/media center. The one we have was my husband's from when he lived by himself and with a crawling, exploring baby it's been an absolute accident waiting to happen. For some reason she is drawn to it like a magnet and is sporting lots of bruises to show for it. It has to go! 


So, when I saw the dresser I thought this would be the perfect solution! Last year, I redid an old dresser and night stand from the 70's for my daughter's room and they turned out awesome. I didn't have the patience or time then, either but I used spray paints and literally had them done in about a two hour period. Here's what they look like. Nice, right? So, I thought, I'll take this dresser, do the same thing with different colours and be done with it. I wanted to do an off-white with some distressing. Easy, right? WRONG! 

I don't know what is up with this thing but it is not going well! I spray painted it and did three coats. Three coats and it had a "crackled" look that I didn't love so much. Like the paint is sticking to some areas, but not others. Plus, it comes off if scraped hard which just won't do with three crazy kids running around. So, I decide I need to sand it better. I go out and buy the paint stripping gel and take off all the paint I just put on. Most disgusting, messy job ever. Picture curdled milk mixed with baby spit up. Piles of it. Gross. 

Then I sand. I sand and sand and sand and get it all down to it's natural wood and cleaned up all nice. This time I try a spray paint with primer in it. Same result. On the raw wood I get the same result! It's like this wood is very porous where the grain is and the paint just won't stick there. 

 So, I decide it needs a melamine paint that can be brushed on instead. We'd done my daughter's doll house that we made in melamine and it turned out wonderful. Turns out no one sells it anymore as it's illegal in Canada since September of last year. Ok. I had no idea! So, the guy sells me some cabinet and furniture paint that he says is awesome and the closest thing but water based still. "Do I want it tinted?" he asks. At this point I just want this done. "Just give me the white, we'll do white now." Ok. I get home. I sand some more. Want to make sure this baby is ready for paint. I pull out my brush, I put some on. SAME RESULT!! It still has a "crackled" look about it. You know the one I mean. You can buy the crackle paint to get the look on purpose. Here's a photo: 


I've now put in many more hours than anticipated. Hours I don't have. The great deal I got on the dresser isn't so great now when you include all the supplies I've bought. So, I keep at it. I've now painted a coat of white on everything. It will sit over night and tomorrow I'll go out there and put on a second coat of white. If it still has the crackled look, well, we'll call it antiqued. I'm not sure what else to do at this point. My only thought is that perhaps the original stain on this dresser was oil-based and because the wood is so porous there's still lots of the oil finish in there that's not liking my water-based paints very well. I have no other guesses. My back hurts, my hands and wrists hurt. I'm done. On a good note, I decided to keep the original hardware and just paint them and THEY turned out amazing! I'll let you know how the rest goes after I drag myself out to the garage tomorrow.....

Thursday, November 29, 2012

Another Daughter, Another Room

Last year I FINALLY finished up my oldest daughter's bedroom. It was a LONG drawn out process mainly because I'm so busy that it's tough to find the time to do things around my own house, but I got it done and I'm still very happy with how everything turned out.

This past May we had baby number three. This meant we had to do some room shuffling. I had never planned on moving either of my older kids out of their rooms but our newest addition was a surprise so something had to be done to fit the baby into the mix. We never find out the sex of our babies beforehand so I had to make some bedroom decisions not knowing if we were having another boy or another girl.

I knew one thing though. After all my hard work on Devyn's room there was NO WAY I was moving her out of it! Many people suggested we put the baby in to share a room with whichever sibling it shared a gender with but the rooms are small. Really small. We had a hard enough time trying to fit all their stuff in as it was. Plus, with the 4 year age gap between middle child and youngest we knew there were all kinds of little toys that would have to be kept away from baby.

So, my son, Reid, moved downstairs to the spare room. He was and still is quite happy with this decision as it's the biggest room in the house!

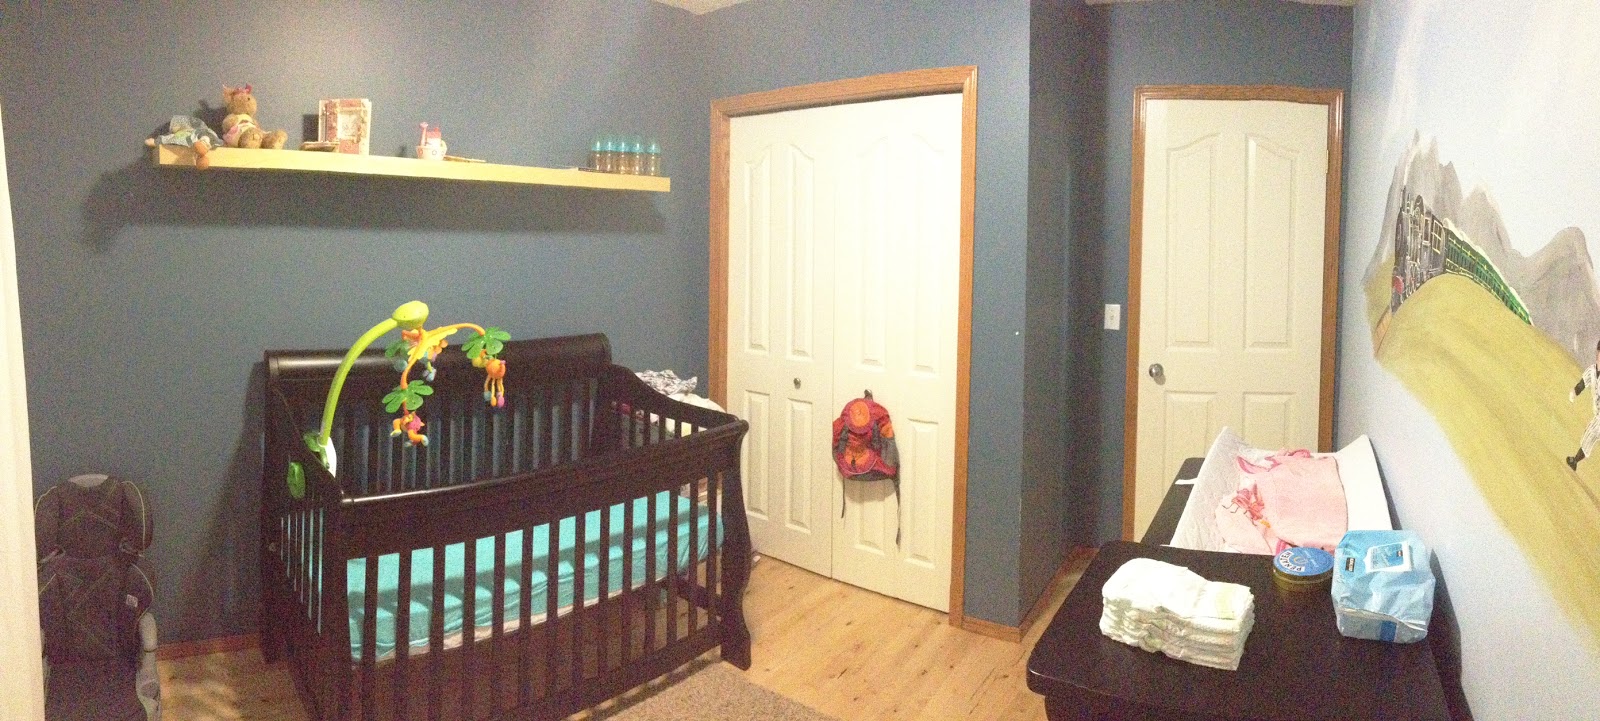
This left his room for the baby. All done in blues with a mural I painted for Reid still on the wall. I figured if the baby was a boy it would be perfect; if it was a girl there would need to be some changes! In May our second daughter, Lachlyn, joined our family. I will admit, I was secretly happy to get to do another room make over and girl's rooms are WAY more fun to do than boy's rooms!


I'm just in the planning stages now. She is only 6 months old after all. She doesn't care what her room looks like. If my track record remains strong she'll be at least 4 before I get it all done!

Here is the room right now. It's not much of anything! A place for her to sleep and us to store extra stuff that we have no place for at the moment!


 (Thank you iPhone for my new Panorama abilities on my camera!)

I don't have much planned yet except perhaps the colour palette. As with Devyn's room I found a piece or artwork to inspire me and I'll take it from there. I came across this print from Children Inspire Design and fell in love with it! I love the words, the colours and the style.


So with that picture in mind I started to plan. Below is the colour palette I've come up with. Roughly. I'm open for variations of it and other colours added in. The purple will be the main wall colour and I plan on covering the mural with the same paintable, textured wall paper I used to cover the mural in Devyn's room. It was such a huge success for us that there was no hesitation on wanting to do it again!


So here's where I need your help! I've started a Pinterest board for Lachlyn's room. A place to start gathering ideas and products. I've only just started to put it together so I'd love your help in contributing to the board if you see things that you think would go well with what I've got so far. Let me know your email address and I'll invite you to be able to pin to the board as well. (Sure wish Pinterest would let you make public boards so you didn't have to go the invite route!)

I'm going for earthy, natural type things. I went really girlie in Devyn's room. This time I want something a little more toned down! I'm also not afraid of colour so don't be afraid! The furniture is currently black with a distressed finish but it likely won't stay the same past toddler age so it doesn't need to play a huge roll in the design.

Let's see if I can get this room going before little Miss Lachlyn is four!